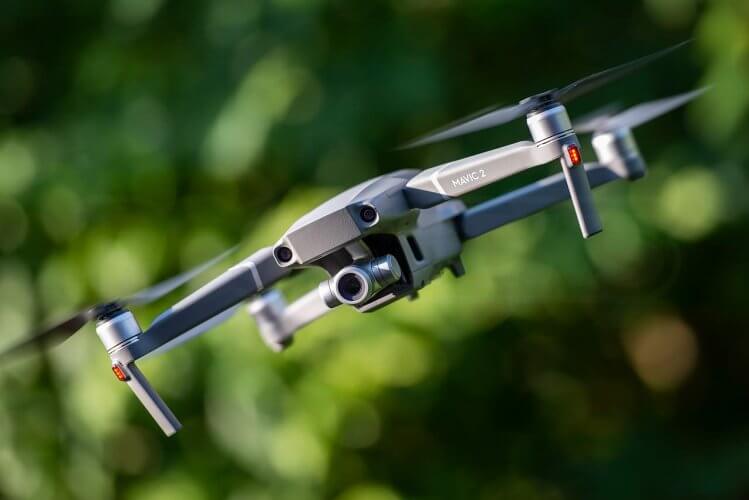
Following the success of our last Q&A blog, our team have come together again to create our very own Mavic 2 expert review. This article reflects our experiences and our opinions on the new drone system after a fortnight of flight testing and snapping and filming with both the Mavic 2 Pro and Mavic 2 Zoom. Whilst this is not intended to be an exhaustive test of every feature on the new drone, we hope it gives you a more personal insight than just repeating the stats as many others have already done. Read on and if you have any questions, please leave them at the end of the page. 
 Intelligent shooting modes include the new Super Resolution shot, which takes nine photos with the telephoto lens and stitches them together to create a 48 megapixel 'super resolution' image.
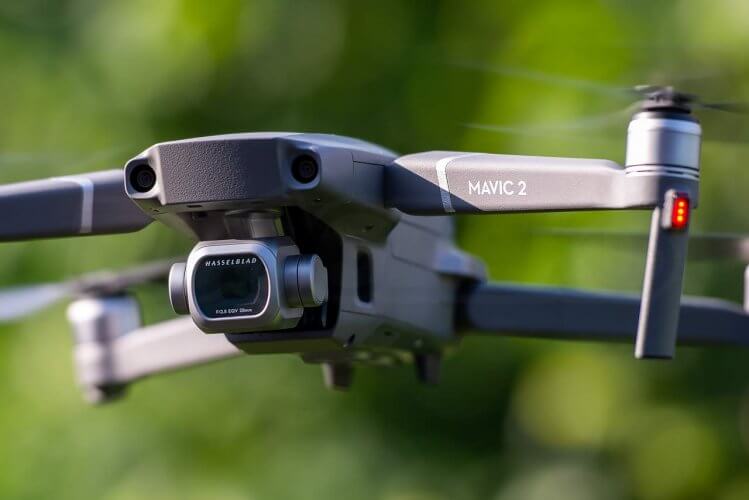 It will take 5472×3648 pixel stills with the usual single/burst/bracketed/interval sets in both RAW and JPEG supporting ISO 100-12800 when in manual mode. This pro model boasts an impressive 14 stops of dynamic range. The cynics in the office feel the Hasselblad logo is more 'marketing exercise' than direct r&d from the optical experts. Eitherway the 10-bit Dlog-M color profile is to be applauded as is the new HLG support for 10-Bit HDR video.

 The sport button on the side has been replaced with the new TPS switch. We welcomed this hardware switch that enabled us to quickly move between tripod and sport mode, maximising time in the air although it is a little stiffer in action than we would like. Note that it needs to be enabled in the app before it will work. Much like the Mavic Air, the transmitter sticks can be unscrewed and stowed in pockets the device holder arms, allowing it to be slipped inside a pocket or the DJI carry case. The drone includes spares for when you invariably lose one of them. Despite supposedly support for thicker mobile devices our phones still needed their slim cases removing to fit in the device holder.
 DJI have opted to construct the drone out of a new, visually lighter plastic composite with a rough texture. The new material is doubtless better suited for the construction but we couldn't help but notice how cheap it felt.


 Re-named from the 'fly more combo' to the 'Fly more kit' it includes two extra flight batteries, a car charger, a battery charging hub, 2 more pairs of propellers, a battery to usb adapter (for charging the transmitter or your phone from one of the batteries) and a compact shoulder bag to put all of that (plus the original drone kit) in. With an RRP of £339 you are saving over £180 on buying all the bits individually making it a 'no-brainer'.
 Naturally flying visual line of sight (as required in the UK) restricts the distance at which can legally fly the drone. During all of our test flights we never had any transmission issues with the standard transmitter and stock antennas, even flying in areas where we would have expected some interference. There are already many range test videos on youtube suggesting the drone can hit the 8km maximum FCC range (5km in CE mode for the UK) in ideal conditions. If you would like to learn more we'd recommend watching Mad RC's great video introducing Ocusync 2.0 and its differences to Lightbridge. The Mavic Pro RC (the original one) reportedly works with the Mavic 2 after a firmware upgrade, note that it only supports the original Ocusync standard so communication is over a 2.4Ghz link.
 The 31 minute flight time is a mere 4 minute improvement on the original's maximum, but in practice it 'feels like forever' compared to our recent experiences with the budget Mavic Air. APAS (Advanced Pilot Assistance Systems) has really come on, finally offering 360° protection thanks to the sheer number of sensors spread about the body. The revised Active Track v2.0 has come on considerably. The original system just couldn't cope with items close by or those moving at speed. The new drone supposedly can interpret the path of an object, second guessing its position should it intermittently lose focus thus enabling it to relocate its target.
  The new gimbal is fantastic and we love the incredible pan angle you can adjust it to, even if the whole touch+hold+drag is a clumsy way to initiate it. Its worth noting that the new DLOG-M & HLG colour profiles are only available when shooting H.265. The aux lighting (landing light) can be found under visual navigation settings, as standard set to auto (it will come on in low light as the drone comes in to land) but it can be set manually to 'on'.

It is an impressive skill and one that could be very useful for gaining bigger prints. Below are another two Super Resolution photos, again press to view them full size.
Whilst it is flexible it is not foolproof. There were a few times in our testing where either the drone moved or the stitching was not perfect, resulting in ghosted edges to the shoreline or bad overlaps.

 Enabling head tracking on the Goggles allows you to pan the camera from -75° to +75° and tilt the gimbal not only vertically (90°) down but also 30° upward, by just rotating your head! This is arguably much more intuitive than pressing and holding your finger on the screen to target the camera, and it allows for complete novices to easily track an object and fly at the same time!


What is the difference between the Mavic 2 Pro and the Mavic 2 Zoom?
Simply put, the only differences between the Mavic 2 Pro and Mavic 2 Zoom models are in the gimbal and camera (plus obviously the protection canopy/transport locks).Redesigned gimbals
The new 3-axis gimbals are solid, heavier units, that hold the camera both sides (on both designs) and now allow for panning as well as pitching up as well as down. The camera and gimbal units are interchangeable between the Mavic 2 Pro and Mavic 2 Zoom, a process that has been detailed in our recent Mavic 2 teardown article.New Zoom Camera
A 1/2.3inch 12MP CMOS sensor capable of 4k. A 2x optical zoom (24-48mm) which stacked ontop of digital zoom gives an effective 4x lossless zoom (out to 96mm!) @ 1080p. This enables you to keep the drone away from people/places/animals and still get the shot. Phase and contrast autofocus detection make for a fast, accurate focusing camera even on the move. Intelligent shooting modes include the new Super Resolution shot, which takes nine photos with the telephoto lens and stitches them together to create a 48 megapixel 'super resolution' image.
Range-topping Hasselblad Camera
Its a 1inch 20MP CMOS sensor sat behind a 28mm equiv. lens with an aperture range from F/11 right out to F/2.8 and a minimum focal distance of 1m. Unlike the Phantom 4 Pro it has an electronic rather than mechanical shutter capable of 8–1/8000s. It will take 5472×3648 pixel stills with the usual single/burst/bracketed/interval sets in both RAW and JPEG supporting ISO 100-12800 when in manual mode. This pro model boasts an impressive 14 stops of dynamic range. The cynics in the office feel the Hasselblad logo is more 'marketing exercise' than direct r&d from the optical experts. Eitherway the 10-bit Dlog-M color profile is to be applauded as is the new HLG support for 10-Bit HDR video.
What is difference between the Mavic Pro and Mavic 2 Pro?
Whilst this article concentrates on the new drones, new camera aside, lets take a look at some of the changes between the old Mavic Pro (original, non platinum) and the Mavic 2 Pro.
Revised Transmitter
The RC1A bundled with both Mavic 2 drones appears similar to the original GL200A transmitter that was optional on the original Mavic Pro but it has undergone an evolution. It has been slightly reshaped and restyled (finished in the light-grey hard plastic seen on the Osmo Mobile 2). The control sticks now un-screw (much like the Mavic Air) with a spare pair included. It now features a 3950mAh LiPo battery, larger than the original's 2970mAh and DJI have also provided an option in the DJI Go App to enable/disable charging of your device when in use. The right hand rotary encoder has been replaced with a rocker dial to mirror the left-hand dial rocker dial used for the gimbal tilt. On the Zoom model this right hand input adjusts the focal length. [gallery columns="4" size="medium" link="file" ids="https://cdn.shopify.com/s/files/1/0263/8469/5395/files/Mavic-2-Expert-Review-transmitter-sticks.jpg|"] It does still retain the removable mobile connection cable (with a Lightning cable installed as standard, USB-C and Micro-USB leads included in the box with slider mounts for them) which many have a love/hate relationship with. The centrally positioned bottom USB still remains if you have a particularly large tablet you wish to use an on external mount. The sport button on the side has been replaced with the new TPS switch. We welcomed this hardware switch that enabled us to quickly move between tripod and sport mode, maximising time in the air although it is a little stiffer in action than we would like. Note that it needs to be enabled in the app before it will work. Much like the Mavic Air, the transmitter sticks can be unscrewed and stowed in pockets the device holder arms, allowing it to be slipped inside a pocket or the DJI carry case. The drone includes spares for when you invariably lose one of them. Despite supposedly support for thicker mobile devices our phones still needed their slim cases removing to fit in the device holder.
All-New Drone
At a glance it appears that DJI have retained the same body for the Mavic 2 Pro but in reality only the silhouette lives on. The new drone is longer wider and taller. A new lower body features updated vision position sensors and high-power landing lights. [gallery size="medium" ids="https://cdn.shopify.com/s/files/1/0263/8469/5395/files/Mavic-2-Expert-Review-pro-old-drones-comparison-folded.jpg|"] Whilst the folding system is similar in design, we noted that the bottom legs do rub on the lower body in the final stages of folding. The legs now feature lights on the front and rear arms, with multiple bright LED's under each window. DJI have opted to construct the drone out of a new, visually lighter plastic composite with a rough texture. The new material is doubtless better suited for the construction but we couldn't help but notice how cheap it felt.
New gimbal
Gone is the weedy lightweight old unit, replaced by a new heavier and more robust system. On both the Pro and Zoom models the camera is held from both sides aiding stability. For reference, the new gimbal itself is actually capable of -135–45° of tilt and -100–100° of pan. [gallery size="medium" link="file" columns="2" ids="https://cdn.shopify.com/s/files/1/0263/8469/5395/files/Mavic-2-Expert-Review-pro-old-new-camera-gimbal.jpg|"] The new gimbal no longer rotates the camera and sensor, so gone is the portrait photo option. The alternative is using the smart panoramic photo modes to auto stitch a stack of three photos vertically. You can learn more about the camera, gimbal its mounting and just how simple it is to change on our teardown blog article. [gallery link="file" columns="2" size="medium" ids="https://cdn.shopify.com/s/files/1/0263/8469/5395/files/Mavic-2-Expert-Review-pro-old-drones-gimbal-cover.jpg|"] The new gimbal transport lock is now two pieces of clear plastic joined by a hinge. It is model specific to suit either the Pro or Zoom camera/gimbal as they are different sizes and shapes. Sadly the new piece is no simpler to attach than the old one, involving some fiddling to get the camera straight before sliding the hinged part between the camera and body, the clipping in the hooked part in three places. Both the Zoom gimbal protector and Pro gimbal protector are available on our webstore should you break or lose yours.Updated Vision Position Sensors
One of the biggest changes to the aircraft is the cutting-edge APAS (Advanced Pilot Assistance Systems) to enable to the drone to navigate and generally not crash into things. New sensors appear on the top, rear and rear-sides of the drone to facilitate this autonomous intelligence, with revised sensors in place of the old ones. Gone are the lower ultrasonics replaced with stereoscopic vision cameras. [gallery link="file" columns="4" size="medium" ids="https://cdn.shopify.com/s/files/1/0263/8469/5395/files/Mavic-2-Expert-Review-pro-old-drones-bottom-sensors-closeup.jpg|"] Different modes use different sensors so do not assume your drone is always on the lookout for objects. Tripod mode - all sensors are active, P(ositioning) mode (GPS) only the front and rear sensors are active, S(port) mode none of the sensors are live. The DJI GO 4 app will warn you of this with a popup, and you can also tell from the little symbol on the top toolbar.New Propellers
The propellers have also been revised, following years of efficiency studies. The new props are longer and kick out at the end. These low noise units along with the sinusoidal drive ESCs are responsible for the reduced noise in flight, although they are reportedly not as quiet as the Platinum Pro setup. The new props appear to have an increase pitched, usually associated with improving performance in higher altitudes. These propellers fit the old craft with some overlap which would create turbulance (even with the vertical spacing) thus flying with these is not advised.New Battery
The new battery is taller, wider, deeper and heavier than the old unit. It has stepped up to a 4S (15.4V) cell with a 59.29Wh (3850mAh) capacity. DJI have now integrated the four charge level lights into a quadrant system bordering the power button, that will be familiar for anyone who had an Xbox 360. As ever, remember that your batteries will need to be fully charged before activating. [gallery link="file" columns="4" size="medium" ids="https://cdn.shopify.com/s/files/1/0263/8469/5395/files/Mavic-2-Expert-Review-old-new-battery-label.jpg|"] The standard charger has been redesigned to include an integral transmitter charge cable that nicely stows in a groove along the side of the charger when not in use. It retains the figure 8 (IEC C7) power lead which is always welcome thanks to its adoption worldwide meaning that you are rarely far from one.
Updated Slots
The super fiddly port covers have finally gone, replaced by rubberised flaps. The memory car slot is found on the same side as the 'Mavic 2' namestamp and you no longer have to unfold the drone to access it. The bind button is found under the rubber flap on the other side. The USB connection is now a USB-C one under a hard plastic cover that is covered by the leg when folded.
The Fly More Kit
With the release of two Mavic 2 models, the combo kit with essential extra components has thankfully been 'un-bundled' from the drone. If you are on a strict budget or if for some reason you wanted to buy multiple combo bundles you can now do so at any time. Re-named from the 'fly more combo' to the 'Fly more kit' it includes two extra flight batteries, a car charger, a battery charging hub, 2 more pairs of propellers, a battery to usb adapter (for charging the transmitter or your phone from one of the batteries) and a compact shoulder bag to put all of that (plus the original drone kit) in. With an RRP of £339 you are saving over £180 on buying all the bits individually making it a 'no-brainer'.
Ocusync 2
The Mavic 2 also marks the launch of Ocusync 2.0, providing more robust communication between the drone and transmitter. DJI assure us that it is capable of providing a 1080p video link at distances up to 8km. It uses both 2.4Ghz and 5.8Ghz frequencies with automatic band switching to provide the most reliable link yet, with latency at just 120ms. Its backwards compatibility also means that with a firmware the original Mavic Pro transmitter can be used to control the new drone. Naturally flying visual line of sight (as required in the UK) restricts the distance at which can legally fly the drone. During all of our test flights we never had any transmission issues with the standard transmitter and stock antennas, even flying in areas where we would have expected some interference. There are already many range test videos on youtube suggesting the drone can hit the 8km maximum FCC range (5km in CE mode for the UK) in ideal conditions. If you would like to learn more we'd recommend watching Mad RC's great video introducing Ocusync 2.0 and its differences to Lightbridge. The Mavic Pro RC (the original one) reportedly works with the Mavic 2 after a firmware upgrade, note that it only supports the original Ocusync standard so communication is over a 2.4Ghz link.
Mavic 2 in Use
The licensed pilots who fly for us were impressed by the stability and the low noise levels of the drone. Whilst few of them fly Mavic Pro's professionally anymore, they said that the new drone feels like it has a lot more momentum in sport mode; You had to be careful when hitting the brakes and leaving more space to flare to a stop compared to a Phantom 4. The 31 minute flight time is a mere 4 minute improvement on the original's maximum, but in practice it 'feels like forever' compared to our recent experiences with the budget Mavic Air. APAS (Advanced Pilot Assistance Systems) has really come on, finally offering 360° protection thanks to the sheer number of sensors spread about the body. The revised Active Track v2.0 has come on considerably. The original system just couldn't cope with items close by or those moving at speed. The new drone supposedly can interpret the path of an object, second guessing its position should it intermittently lose focus thus enabling it to relocate its target.
  The new gimbal is fantastic and we love the incredible pan angle you can adjust it to, even if the whole touch+hold+drag is a clumsy way to initiate it. Its worth noting that the new DLOG-M & HLG colour profiles are only available when shooting H.265. The aux lighting (landing light) can be found under visual navigation settings, as standard set to auto (it will come on in low light as the drone comes in to land) but it can be set manually to 'on'.
Mavic 2 Hyperlapse
This is an impressive system that automates shooting of timelapse's with movement. It has proved very popular in the Osmo 2 Mobile and taking it to the air opens up a whole host of opportunities. [video width="1280" height="720" webm="https://cdn.shopify.com/s/files/1/0263/8469/5395/files/hyperlapse.webm"][/video] Found under the flight modes, Hyperlapse is the small clock icon between normal and quickshot. Motion options include Free (flying the drone manually whilst snapping at preset interval) which was used to produce the hyperlapse above, Circle (select a point of interest on screen and perform a hyperlapee around it once a direction has been selected), Course Lock (select a point on the map for the drone to fly towards, allowing you to fly towards whilst adjusting height etc) and finally Waypoint (create a track to fly around). Even in the most basic mode (Free) the app allows you to select your interval for shots (number of frames) and the total video length (seconds) and once its running will warn you when you are nearing the end of your session. Note that whilst flying in this mode you will get a prompt to enter cruise control by pressing C1, you can then release the sticks and the drone will continue flying in that direction. In waypoint mode you can fly the drone to points, set its heading and what not before adding it as a waypoint, before hitting go on the right of app. You can review the flight route on the map.The drone will fly back to the start point and fly through the points There is the option to retain the original hyperlapse photos as either JPEG or RAW so if you wanted to you could retouch them and build your own video.Mavic 2 Zoom
We setup this drone to be flown with an Android phone via the USB-C connector. Sadly we had a problem using the app to upgrade to the latest firmware. In the end we moved to the new DJI Assistant 2 For Mavic 2 from the DJI Mavic 2 downloads page and used the included USB-C cable to update the drone on a PC. [gallery size="medium" link="file" ids="https://cdn.shopify.com/s/files/1/0263/8469/5395/files/Mavic-2-Expert-Review-zoom-rear.jpg|"] The zoom is controlled by the right hand dial on the transmitter (usually used for exposure adjustment etc), whilst the left hand dial still alters the gimbal angle. We feel it would be nice if the zoom could ramp on and off (or set to do so) instead of hitting the hard limits when filming.
Mavic 2 Zoom-lens
If we had £1 for every time someone had said 'how do I zoom in?' whilst we demonstrated an older DJI drone, we'd easily have enough money to buy a Mavic 2 Zoom! This feature has to be one of the most requested from consumers and professional drone pilots alike, especially those who use their drones for surveying. The Mavic 2 Zoom features 4x zoom, 2x of which is optical. The later part is important as when filming in 4k mode it may feel like the super telephoto end is missing. Only filming in 1080p and below will provide access to that great 96mm focal length for those fantastic parallax shots. The two stills were taken from a video shot in 1080p and demostrate just what that range looks like, the first at 24mm and the second at 96mm. When zooming whilst filming, its best to set your focus whilst zoomed in. [gallery columns="2" size="medium" link="file" ids="https://cdn.shopify.com/s/files/1/0263/8469/5395/files/Mavic-2-Expert-Review-zoom-video-24mm.png|"] To give you an idea of how the zoom looks in photo mode, take a look at the two below examples: [gallery columns="2" size="medium" link="file" ids="https://cdn.shopify.com/s/files/1/0263/8469/5395/files/Mavic-2-Expert-Review-zoom-windmill-48mm.jpg|"] The first shot was taken at 24mm whilst the second was taken zoomed in at 48mm. Each shot was taken with the drone stationary and the focus set (With the C1 button on the back of the controller). [gallery columns="2" size="medium" link="file" ids="https://cdn.shopify.com/s/files/1/0263/8469/5395/files/Mavic-2-Expert-Review-zoom-seaside-48mm.jpg|"] The camera enables you to really punch in to a subject whilst maintaining a safe distance from it.Mavic 2 Zoom Super Resolution
An interesting new trick the Mavic 2 zoom combines its longer focal length, hover stability and impressive processing power to provide a brand new panorama mode. Found under the photo shooting modes, Super Resolution locks the drone in place in the sky whilst automatically moving the gimbal to take 9 zoomed-in photos. These are then stitched in-drone to produce a huge 48MP (8000 x 6000px) photo. Below the left shot is a standard 24mm photo followed by an image shot in Super Resolution mode, press the text link below each one to view them full size.
 View Full Size |
 View Full Size |
 View Full Size |
 View Full Size |
Mavic 2 Zoom Dolly Zoom
This killer feature was well publicised during the launch. Somewhat buried under the Quickshot mode menu, this flies the drone backwards (with the protection of the rear vision sensors active) whilst filming and zooming in. Its the sort of high-end film effect that had been restricted to Hollywood budgets due to the restrictions involved. [video width="1280" height="720" webm="https://cdn.shopify.com/s/files/1/0263/8469/5395/files/dolly-zoom-beach.webm"][/video] Whilst we can see it becoming somewhat overused by drone-obsessed vloggers, having such an advanced camera/flightmode is welcomed in a drone this compact. [video width="1280" height="720" webm="https://cdn.shopify.com/s/files/1/0263/8469/5395/files/dolly-zoom-windmill.webm"][/video]Mavic 2 Pro
We tested the Mavic 2 Pro using an iPhone 6 and it was great to see that the DJI Go 4 app still runs fine on what is now quite an old smartphone. As mentioned the transmitter comes setup with the lightening cable installed so it is literally plug and play. [gallery size="medium" link="file" ids="https://cdn.shopify.com/s/files/1/0263/8469/5395/files/Mavic-2-Expert-Review-Pro-viaduct.jpg|"] That huge 1inch sensor offers fantastic dynamic range, allowing us to take photos and shoot video 'into dusk' without underexposing darker frame areas, or sacrificing any clarity. [video width="1280" height="720" webm="https://cdn.shopify.com/s/files/1/0263/8469/5395/files/mavic-2-pro-pier-spin.webm"][/video] On review we felt it offered similar performance to the Phantom 4 Pro, albeit with a touch softer feel to the image even in 4K HQ mode. The lack of mechanical shutter is a shame but potentially was a step too far in a unit this small. We feel this is finally a Mavic that offers an image that lives up to the 'Pro' nametag and expect many will trade their bulky Phantom 4's in for it.
Mavic 2 Pro Full FOV and HQ settings
Under video size setting (in video mode) you will note there are two settings, 4K HQ and 4k Full FOV, both stating the same resolution of 3840x2160. As such the Mavic 2 Pro does effectively have some 'zoom' ability in video mode thanks to the digital cropping. Put simply:- 4K Full FOV displays a 75° field of view and the drone downsamples this wide view taking in the 5.5k image from the full-face of the sensor down to 4k resolution.
- 4K HQ provides a 55° field of view, cropping into the centre portion of the image sensor to provide a 4k resolution.
Mavic 2 Pro distortion
When reviewing footage from the Mavic 2 Pro, specifically videos shot in DLOG-M we did notice some distortion. During filming (in the DJI Go 4 app) this is not as noticeable in the preview, presumably because it is processing the image and correcting this distortion. The following snapshots were taken from video clips, the first running the standard colour mode has been corrected in drone whilst the second and third show the barrel distortion. The final image is a screenshot taken from the app whilst filming the third (D-Log) clip. You can see that the distortion is not as evident, suggesting the app is performing some correction. [gallery columns="4" size="medium" ids="https://cdn.shopify.com/s/files/1/0263/8469/5395/files/Mavic-2-Expert-Review-app-corrected-view.jpg|"] This is something that we expect DJI to patch with upcoming firmware but for now @thefilmpoets have produced a distortion correction plugin for After Effects and Final Cut pro available here.Mavic 2 and DJI Goggles
The Mavic 2 is compatible with the DJI Googles and the DJI Goggles racing edition following a firmware upgrade. The goggles allow you to take advantage of the new gimbals extended tilt but and now user-controllable pan in an incredibly accessible way. Enabling head tracking on the Goggles allows you to pan the camera from -75° to +75° and tilt the gimbal not only vertically (90°) down but also 30° upward, by just rotating your head! This is arguably much more intuitive than pressing and holding your finger on the screen to target the camera, and it allows for complete novices to easily track an object and fly at the same time!
Should I buy a Mavic 2? Which Mavic 2 Would you recommend?
If you are currently sat with an original Mavic Pro, it is finally time to list it on eBay. The same could be said for any Phantom older than the Phantom 4 Pro v2.0! The new air frame is a real step forward on all fronts and the cameras available are a large step up in both functionality and (particularly in terms of the Pro model) quality. In terms of which drone you should opt for, well the answer all depends on your intended use. We put the question to our instagram and facebook followers and were met with a heavy bias towards the Pro over the Zoom. We can understand that most will hanker for the gear that is capable of the highest quality output, in which case the Pro model (with its £200 premium) is the one to buy. Its larger sensor, higher sensitivity will suit those who frequently fly in low light and the 10-bit colour adds headroom for post production. [gallery columns="2" size="medium" ids="https://cdn.shopify.com/s/files/1/0263/8469/5395/files/Mavic-2-Expert-Review-zoom-hover-underside-detail.jpg|"] However, whilst some will turn their nose up at the smaller sensor of the Zoom camera, we feel that the vast majority of consumers will benefit more from a flexible focal length than the larger sensor, higher sensitivity and 10 bit colour (especially considering how few may have a display to experience that last one on) that headline the Pro model. We'd go as far as including some professional content creators who focus on delivery to platforms that compress and restrain output (we're looking at you facebook/instagram) would be more than happy with the results from the zoom model. Needless to say, if you are purchasing the drone for aerial inspections, the compact folding Zoom model is about to become your new best friend. We will continue to look into the capabilities of the new platform over the coming months so keep your eyes on this blog, Instagram feed and Facebook page to keep up with the latest developments!


