Reviews
Funtek Raid Adventure : A low-cost, Land Rover style RC car


 We will be converting our TRX-4 to brushless and will be using a Absima Brushless Combo Set Thrust BL ECO to replace the current powertrain, other brushless combos are also available. It is not quite as advanced as the standard ESC but with its programable start mode, and configurable drag brake/brake force it should be suitable for use in the Defender.
 There are four 2mm screws, two through the bottom and two attaching the sides to the metal chassis rails.
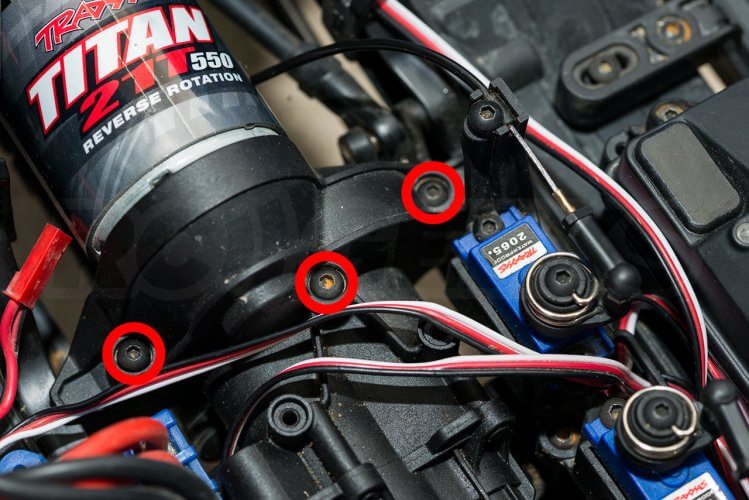
  From there we removed the three 2mm screws from the top of the motor cover.
  This motor cover actually holds the motor mount plate firmly vertical. To remove the motor you disconnect the power cables from the ESC and lift the unit straight up.
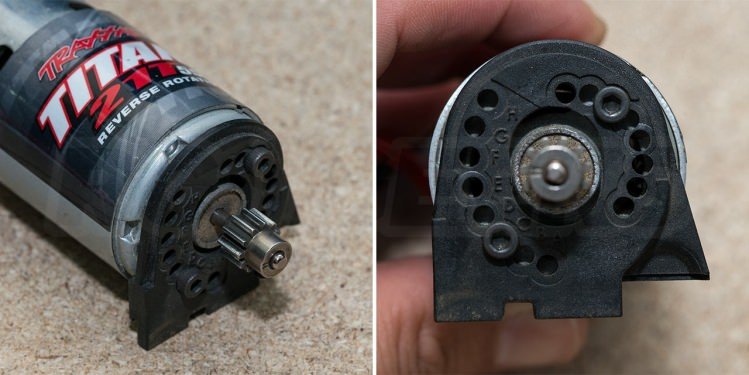
  The TRX-4 chassis uses a thick plastic motor mount that has 16 holes in it (paired and labelled A to H), offering multiple motor positions and from the factory ours came setup in position C.
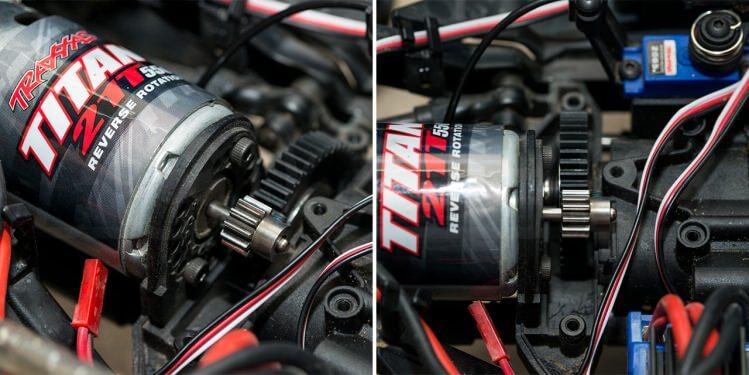
  Remove the pinion gear from the motor shaft using a 1.5mm hex driver.
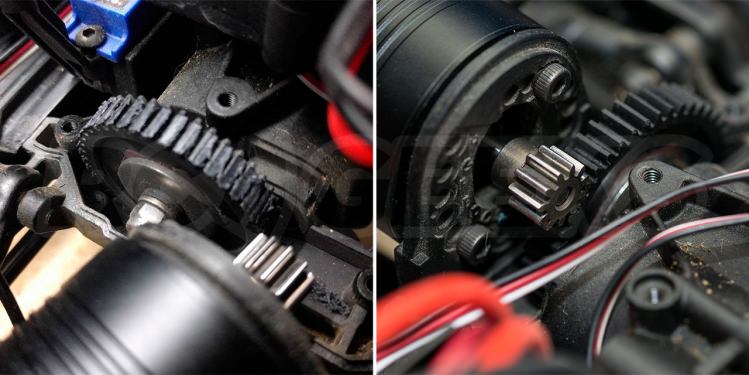
  Installing the motor will take some trial and error to ensure the gears line up. We started by rotating the pinion gear 180° over before installing it, to compensate for the shorter motor shaft length. The motor needs to be supported to ensure the motor mount stays vertical as you clamp down the motor cover plate. At this point it is worth test fitting the body to ensure it does not foul the motor or power cables.
 If you are having issues with stripping spur gears, it can be tempting to want to swap them out for more robust metal cogs; We tend to advise against this. Plastic spur gears (whilst being noticeably quieter) can act as transmissions savers, taking the abuse that would otherwise get passed down to other weaker components.
 The lid of this is held on with three 2mm hex screws on the top, once removed the lid can be taken off, being careful not to lose the rubber seal gasket. The speed controller is plugged into the second channel of the receiver and can be unplugged.
  But to free the cable we also needed to remove the receiver box cable clamp, again another pair of 2mm hex screws on the top.
  We chased the three wire signal cable across the chassis to the receiver box. It heads between the two diff control servos and can be free'd from the hoop by removing the central 2mm hex screw between them.
  We then ran the new cable along the same path and replaced all the lids ensuring the seals were re-seated correctly to maximise the water resistance. Note the new remote power switch the Thrust ESC comes with. With its waterproof cover this could be mounted in a location still accessible with the top shell on, something the standard car lacks.
 We have seen several guides for expanding the depth of the battery tray by replacing the hardware and shimming the plastic latch up to clear thicker cells. There are also several aftermarket battery trays available that lower the cell's position in the chassis, reportedly improving the centre of gravity.
 We left most of the setup as standard (maintained the reverse function, left the drag brake off, left the low voltage cutoff as standard) but dropped the punch of the start mode to Level2 to avoid lunching the gears. We intend to experiment with the maximum brake force, potentially dropping down it to safeguard the transmission.
 Initially we played it safe with the 2S battery but straight away you could see the difference. The truck had a lot more punch in acceleration and would perform small wheelies on grippy inclined tarmac. As you can see from the short clip below, at pace the truck will now casually defy gravity, skipping over the pump track berms and launching itself into the air on the steeper lips. With the 3S 11.1v (75C) battery in the truck, it turned into a completely different beast. Giving it 'full beans' off the line will result in ridiculous wheelies even with the diffs locked. Even when already travelling at speed, pushing past 80% throttle would send the nose skyward and the tyres ballooning out from the rims as the big Defender cleared 23mph! Total disclosure, we did manage to break steering system powering into corners before we even got the 3S cell plugged in. The metal servo gear had lunched the splines on the servo horn and was just free spinning. Thankfully this was rectified with a cut down Absima metal servo horn; Perhaps we were a little foolish asking so much from a crawler steering system!
  We love our TRX-4 Land Rover Defender and will continue to tweak and modify it over the course of the year. Next on the agenda is fitting the official lighting kit and potentially a remote controlled winch.
 We stock a large range of Traxxas electric models to suit any terrain or skill level. You can learn more or purchase the Traxxas TRX-4 Land Rover Defender in the three body colours Grey (as pictured) Green and Red on our webstore. Note that if you are intending to use the standard speed controller you will need a battery with the new Traxxas iD connector. Have you noticed any errors in this blog? Perhaps you have questions regarding the Traxxas Defender? Please leave your comments below!
Written by
Tom Begglesworth