Reviews
Funtek Raid Adventure : A low-cost, Land Rover style RC car
 4MP auto-stitched panoramas created in the DJI Mimo app leave many disappointed with the output of this £300+ device. Thankfully the answer lies in 'post-processing' the images on a computer, so in this article we take a look at how this can be achieved (on select operating systems) for free!
 The below (3x3) panorama captured from 9 photos has been merged down to a photo just 2359 by 1705 pixels, aka a 4MP image. Again this seems pretty weak compared to the 12MP image you get from the same device when shooting a single still.
  Thankfully there is a solution; using software on your computer to stitch the images together whilst maximising potential detail. There are several pieces of software available to do this and we will trial a few to show how it can be done on a budget. Furthermore, even in the standard 'basic' mode, the Osmo Pocket will store the original full-resolution images it captured on the SD card under a PANORAMA folder. This means (assuming you haven't formatted or cleared your memory card) you can go back and recreate previously shot panoramas in higher detail!
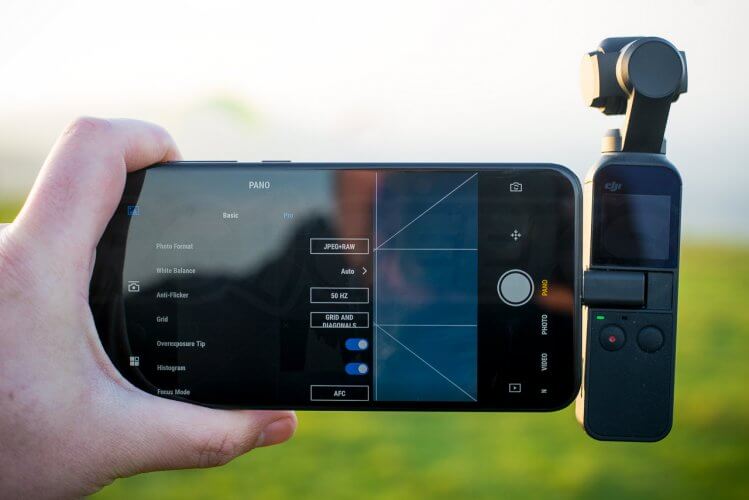 When you disconnect your smartphone the Osmo Pocket will ask you if you wish to exit pro mode, if you press OK it will revert to basic mode and no longer shoot with RAW so for our purposes it is best to hit cancel. Note, shooting both JPEG and raw will take up more space on your memory card. 9 high resolution JPEG's (for a 3x3 panorama) typical come in at under 50MB whilst the same 9 images in RAW format take up over 200MB; bear this in mind if you shoot a LOT of panoramas and only have a small capacity sd card.
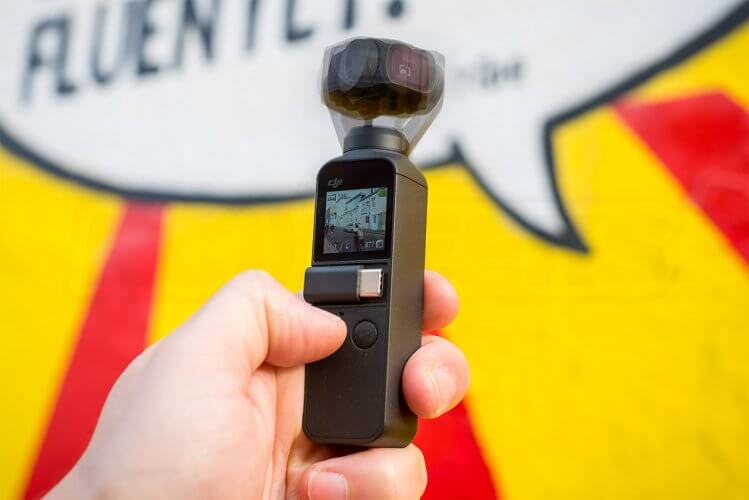 Turn on your Osmo Pocket, swipe left across the screen to change shooting modes and scroll to the bottom to 'Pano'. Swipe once more to the left to ensure you have 180° mode selected before swiping right across the screen to return to the live view. The screen will show a panorama icon with '180' displayed next to it. Position the Osmo Pocket so the body is positioned in the middle of the scene you wish to shoot. If you want to shoot a 'selfie' panorama (or just have the camera shooting over the screen) tap the right hand button three times to flip the camera round. Hold the body upright and hit the record button.
  As illustrated above, the gimbal will swing the camera around, taking four photos. On screen the Osmo Pocket might remind you to keep the device upright (and ideally as steady as you can, perhaps place it on a flat surface if possible) with a yellow alert message. When complete the gimbal will return to the central position and live view will return to the screen. If his isn't clear, take a look at this DJI video tutorial on panorama shooting.
Either hook up your Osmo Pocket to your computer, or remove the MicroSD card and insert it into a reader. You are looking for the 'PANORAMA' folder, in which you will see a whole load of subfolders, each of these contains the original photos taken for the panorama. Browse to the collection of images you want to stitch together and make a note of the folder name. Download DJI Media Maker which at-time-of-writing is still available on the DJI website. The free software is available for both Microsoft Windows and Apple OSX operating systems. Released way back in early 2016, it was designed for stitching panoramas shot on the (now defunct) original DJI Osmo handheld camera. Once installed and run, you are greeted with a simple application. Drag your folder of panorama photos (or you can click and browse to) into the app. The output field in the form will then be activated, by default it will save the panorama image you create in the folder a 'level up' from the source images but you can change that by pressing the folder icon. The only configuration you need to do is select 180° Panorama as the mode and hit start. 
Hit start and the software will start processing the images, giving you an estimated time till completion. When finished the status will switch to 'completed' and the stop text will switch to an 'Open' link that can be pressed to load up your completed image  This software gives good results with minimal effort. It doesn't correct 'all' of the barrel distortion and can struggle with panoramas where the exposure has changed dramatically across the scene. Below is an untouched output image from the software, press to view it full size.

At over 9000 pixels wide the processed image retains a lot of detail (and admittedly my fingers at the edge of the frame!). Lets compare that with the 2400 pixel wide panorama produced by the DJI Mimo App, again press to view it full size.  Its obvious (to us at least) that post processing these images even with simple software offers a far superior image.
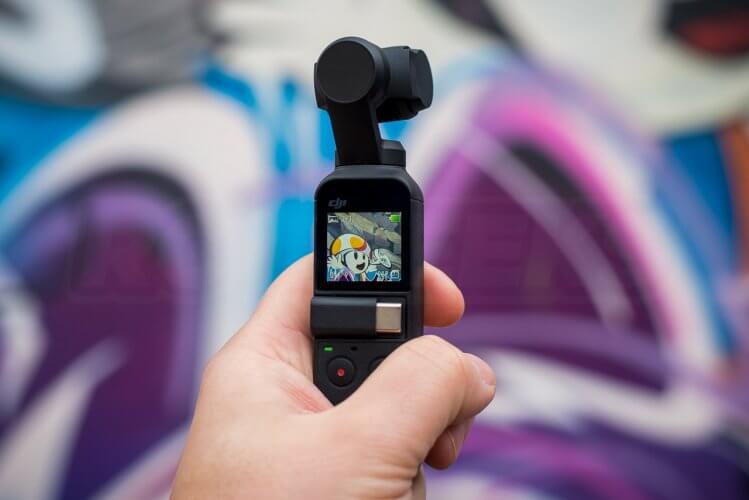 Position the Osmo Pocket so the body is positioned in the middle of the scene you wish to shoot. If you want to shoot a 'selfie' panorama (or just have the camera shooting over the screen) tap the right hand button three times to flip the camera round. Hold the body upright and hit the record button. Note that attempts to tilt the camera before taking the grid panorama will be ignored as the gimbal will re-centre before going through the recording phase. You will need to hold the gimbal as steady as you can and for longer than with a 180° panorama, as the device is going to take 9 photos this time instead of four.
DJI's Media Maker will process these 3x3 images (you simply need to select 360° panorama) but lets look at a piece of software with with more advanced options. Microsoft's Image Composite Editor (ICE) is available for free from their website here. When installed, fire it up and point it at your collection of images, just as you would with Media Maker. The software defaults to 'simple panorama', auto detecting the order of the images so you can go ahead and hit next.


Once processed you are presented with the following screen, showing you how the images match up and allowing you to switch around the projection. To our ours, Mimo tends toward the 'stereographic' lens projection but since this test image is of a flat wall, we are going to use perspective adjustments for a flatter image. We hit next and the image is processed again.


The processed image is displayed in the application where you can then decide how to crop it. For the purposes of this walkthrough we hit Auto complete. Depending on the selected projection, ICE will fill in these areas lacking image data. After pressing next we can finally export the image, an incredible 14600 x 14600 pixels large!


Again there is no comparison in terms of detail from the exported image. Utilising auto crop and the default export options gave us the following image (press to view full size):  Compared to the 2400 pixel wide image (cropped and distorted) image processed in Mimo (again press to view full size).
  We have only scratched the surface of the potential of Microsoft's ICE. The software is very flexible, allowing for all manner of adjustments from basic arranging the order or photos (see below) and distortion adjustments (again below) to more advanced processing.

 We feel that Image Composite Editor is a superior tool to Media Maker thanks to its adjustment of projection, superior 'smart fill' of empty areas, orientation tools, wide range of output formats (including support for interactive images) and more. If you are using a mac or are running linux, take a look at Hugin, an open source cross-platform solution. It can be more complicated to use but is free and can produce great composites.
If you have setup your Osmo Pocket to leverage ‘pro’ mode then now its time to try photomerging your DNG RAW files in your panorama folder, instead of using those JPG. We will be using Adobe Lightroom since we already use it for image editing, but other packages are available.
Import your images to the timeline, select them all before running ‘Photomerge Panorama‘ from the menu (or pressing Ctrl+M)
The following popups will appear when processing a panorama. The software defaults to a spherical projection and we are going to retain the punchy lens distortion in this example as we feel it adds to the subject matter. You can warp the boundary to fill in the borders but we opted just to auto crop the image as shown.
Lightroom will produce a new RAW file of the images merged together and save it as a DNG file in the same folder.

From here we can edit the photo with all the benefits of non-destructive raw processing, modifying the exposure, bringing up detail lost in shadows, adjust the saturation of certain colours or push the hue over to complete change the look. For example below is the DNG created by lightroom, then re-developed by us just an example.
As before, here is the exported (JPG 75%) reworked image from lightroom, at 7600 by 4700 pixels (press to view the image full size).
Compare this against the flat looking low-resolution (2400 x 1700 pixel) Mimo generated image.
 If you were feeling particularly crazy lightroom is also capable of producing HDR panoramas, thus using Pro mode anda tripod you could bump the exposure to capture three 9 image panoramas and stack the resulting 27 photos into one RAW HDR image!
 The grid panorama has a lot more to deal with in terms of angle, perspective and lens distortion and thus has a lot more overlap, some 5-10% of the central image remains unique whilst the rest of the frame is used for anchoring the surrounding 8 images to it.
 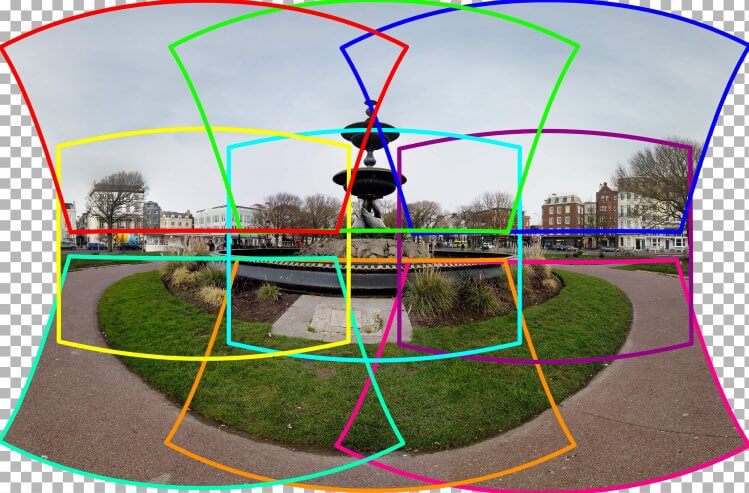 Large areas of overlap will provide more information for Mimo (or any other stitching) app to work with when it comes to blending, but will also cap just how high resolution the resulting image can be.
 Holding the Osmo Pocket as still as we could we took two images of an unforgiving, detailed street scene to see how large we could go. Two panoramas were taken, Mimo was allowed to do its thing and then we compared them to our processed montages in Photoshop. This 'super resolution' wide (4x1) panorama measures 9632 x 2818 pixels aka a 27MP image! Click the preview to view the full size image. Note that content aware fill was used to fill the (minimal) extremities but the image hasn't undergone any other retouching or sharpening.
  If we switch up our 'super resolution' processing to a grid (3x3) panorama, we get a composite image measuring 7571 x 5264 pixels, just shy of 40MP! This time round we felt it fairer to crop into the image instead of filling the much larger empty space, click the preview to inspect the full image 1:1.
If you are struggling to understand the size difference, the two diagrams below show the frankly huge difference in scale between the Mimo produced images and ones ‘photomerged’ in Photoshop (click to view them) . The light blue areas would require ‘content aware’ image generation to fill out to the maximum area and thus should be taken with a grain of salt.
Be aware that unless you have a relatively powerful computer, processing large images (particularly the initial alignment phase) will take be a slow process and might take some time. That said we really feel the results you get from this process speak for themselves, producing images two to three times the size/detail, making the extra effort worthwhile!
Whilst we appreciate that many people want a user friendly, quickly produced panorama for posting to their facebook feed without a second thought, we know the device is capable of much more. Sadly we only had a short amount of time with the much-sought after camera, thus the comprised selection of scenes shot.
Stitching together a panorama is not a new concept and we really hope that DJI addresses this issue in a future update of the Mimo app. We are not software engineers, but considering other applications leverage powerful modern smartphone processors to alter detailed images in real time, it doesn’t seem beyond the capabilities of current devices to produce higher resolution panoramas.
This is by no means the only way of producing such media, so if you have another preference for stitching your panoramas (including more serious solutions like PTGui), please share them with the community by leaving a comment below. We hope this tutorial helps you get more from your Osmo Pocket, a device that we are finding new shooting challenges for everyday.
You can pick up the Osmo pocket on our webstore here or learn more with our review and unboxing article.Written by
Tom Begglesworth